How To Implement A Custom Context Menu In Ag-Grid
Configuring AG-Grid context menu using angular

Introduction
AG Grid is a powerful data grid component that provides loads of built-in developer-friendly features such as filters, sorting, pagination, custom rendering, and more for handling large amounts of data.
NB: Context menu, is only available in the Enterprise version of Ag-Grid.
I assume that you have an angular project setup with Ag-Grid and you have an Ag-grid enterprise license as well.
You can check out the getting started guide
What is a context menu?
A context menu is a popup(GUI) that is displayed when a user right-clicks on an item.

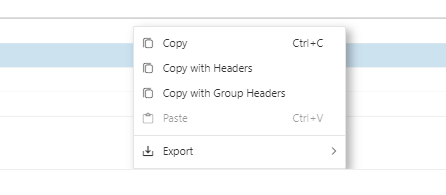
You can see Ag-grid’s context menu by right-clicking on a cell. By default, the context menu provides the options Copy, Copy with Headers, Copy with Group headers, Paste, and Export (CSV Export) as seen in the image below

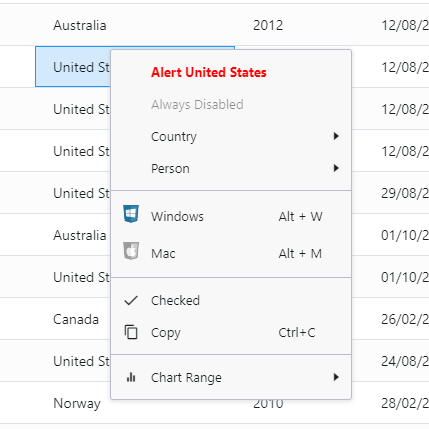
Sometimes you need more than what the default context menu options provide. You can configure the Ag-grid context menu options to look exactly the way you want.
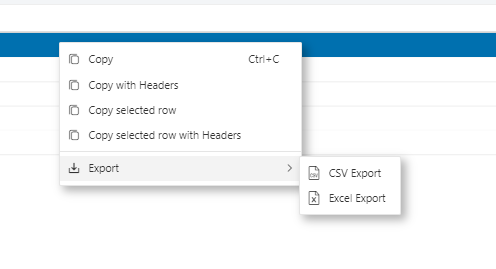
In this article, we will configure the Ag grid context menu to look like the image below.

Copy — copies the highlighted cell
Copy with Headers — copies the highlighted cell with the column header
Copy Selected row — copies the selected row
Copy selected row with Headers — copies the selected row with the column headers.
CSV Export — export grid data as a CSV file
Excel Export — exports grid data as an Excell file
You can visit the Ag-grid documentation to see the built-in menu items
Enabling the Context Menu
Register the required modules in app.module.ts or whichever file is your parent module.
When the modules are correctly registered you should see the default context menu popup when you right-click on your grid.
Configuring the Context Menu
You can customize the context menu by providing a getContextMenuItems() callback. Each time the context menu is to be shown, the callback is called to retrieve the items to include in the menu. This allows the client application to display a menu individually customized to each cell.
You can read more from the docs here.
NB: The result of getContextMenuItems() should be a list with each item either a string or a MenuItem description.
The code below shows how to add menu items to the context menu
Below are some examples of various actions used in the code above that you can implement
How do we use the context menu function we just created?
We will add the getContextMenuItems option to the gridOptions.
In the template, we add the gridOptions to the grid
Notice that we added suppressCopyRowsToClipboard: true and rowSelection: “single” on the gridOptions as well. This is because we want to be able to select a row but use our custom Copy selected row option in the context menu to copy the rows instead of the default copy row behavior, so we disable the default copy rows behavior by setting suppressCopyRowsToClipboard: true
And we have this

So That’s it.
Don’t forget to give it a 👏 if you find this useful.
Thanks for reading.
